Tuesday, April 28, 2020

Aunt Nina's Banana Bread Cupcakes !

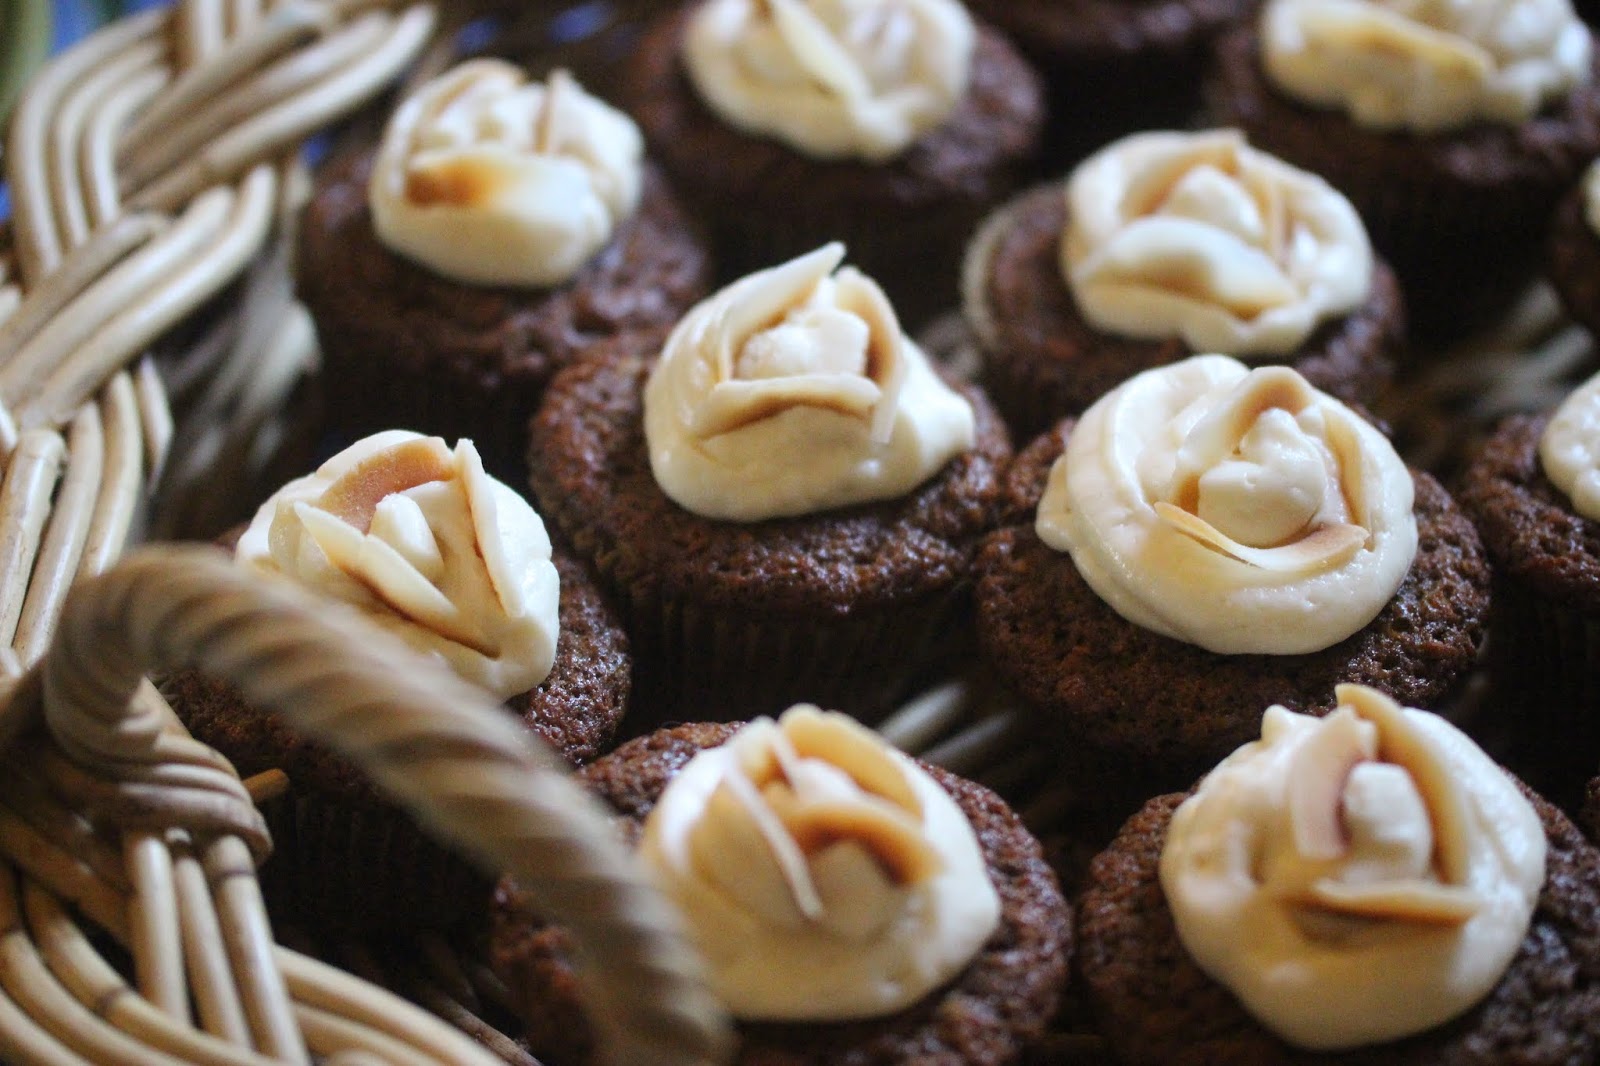
   Hello friends ! Do you have happy memories of yummy foods cooked by one of your parents, a grandmother, grandfather, an aunt, or an uncle ? I can remember how happy I was when my mother would make lasagna for our annual Fourth of July block party, and being overjoyed when we had taco night at home ! My little Swedish American grandmother would make us a plate of delicious soft ginger cookies at Christmas time. Aunt Dagne was a wonderful cook, making things like her orange and avocado salad, and she always set a beautiful table. The cupcakes pictured here were inspired by my Aunt Nina's scrumptious and super moist banana bread ! The first time I tasted her banana bread was such an exciting moment for me !! I had never had such moist banana bread in my life ! Of course I HAD to have the recipe ! I believe the main reason they are so moist is because there are 6 bananas in the recipe, which I think in most banana bread recipes is less.
   I changed Aunt Nina's recipe a little by putting honey in instead of sugar, using whole wheat flour instead of white, adding coconut, sometimes chocolate chips, adding olive oil instead of shortening,  making cupcakes instead of a loaf, and topping them with a honey, cream cheese frosting and toasted coconut. Ooooh yeah !

                                                                     Ingredients

1 cup honey
1/2 cup virgin olive oil
1/2 cup melted butter
6 ripe bananas, mashed
4 eggs, well beaten
2 cups whole wheat flour
1 teaspoon salt
2 1/2 teaspoons baking soda
1 cup coconut flakes
1 cup chopped walnuts
1 cup chocolate chips (optional)
1/2 cup coconut flakes for the topping

                                                                  Banana Bread

   Preheat your oven to 325 degrees. Oil 2 loaf pans, or put cupcake papers in 2 muffin pans. In a large mixing bowl, stir together the honey, olive oil, butter, mashed bananas, and the beaten eggs. Add the flour, salt, baking soda, coconut, and walnuts. If desired, chocolate chips can be added. If making the loaves, bake the two loaves for 50-60 minutes. If making the cupcakes, bake them for 20-25 minutes. Cool the cupcakes and make the frosting. I put the extra coconut flakes on a baking sheet, turned the broiler on and put the flakes under it. Watch  very carefully until they are lightly toasted and cool them.

                                 Honey Cream Cheese Frosting (Adapted from The Splendid Table)

12 ounces cream cheese, softened
1/2 cup (1 stick) butter, softened
2 teaspoons vanilla
6 tablespoons honey
pinch of salt

   In a medium bowl, whip together the cream cheese, butter, vanilla, honey, and salt to taste. I put the frosting in a zip lock bag, cut the tip off one corner, and swirled the frosting on top of each cupcake. then I put a few toasted coconut flakes on top of each one.
   I hope you enjoy making and eating these cupcakes or banana bread. They would be fun to make with children too ! God bless you with love, joy, and peace. "She is like those merchant vessels, bringing her food from far away." Proverbs 31:14


Sunday, March 29, 2020

Mango, Avacado,and Arugula Salad !

   Greetings my friends ! Our country is currently going through a crisis right now with the Corona Virus. We are advised to eat healthy, exercise, stay home as much as possible, wash our hands frequently, stay 6 feet away from each other, among other precautions.
    Sooo....speaking of healthy food....I believe I may have been looking for a healthy salad recipe years ago with mangos in it, when I fell upon Laylita's Mango, Avacado, and Arugula Salad at laylita.com. Her salad is gorgeous with its vibrant colors and the flavor is out of this world with the addition of a spicy orange, lime vinaigrette dressing ! She has been heavily influenced from her upbringing in Latin America with its' wonderful spices and colors !
   I tweaked this recipe a little by adding toasted pumpkin seeds, changing the orange juice in the salad dressing to orange juice concentrate, to intensify the flavor, and added chili flakes because most of the time I usually do not have a hot red chili pepper on hand. That's funny because there is a Fresno chili, and Fresno, California is where I live ! If I use arugula , I like to use baby arugula leaves because they do not have such a strong, almost hot flavor !
   I have been finding HUGE, organic mangos that are grown in the USA , in the winter, and maybe in the summer if I can recall, at Whole Foods Market. This is a great spicy, citrusy salad to take to a bar-b-que with meats or fish, or to eat with Mexican and South American food !

                                                                Ingredients

6 cups arugula leaves  (I like to use a combination of spinach and baby greens too.)
1 mango peeled and cut into long, thin slices
1 avocado peeled and sliced (It's good to slice the avocado right before serving, to prevent browning.)
1/2 red onion sliced thin (I use a mandoline slicer for beautiful slices, but be VERY careful not to cut yourself !)
1 tbs lime juice
1 tbs olive oil
1/2 cup pumpkin seeds

                                                             Spicy Orange Vinaigrette

1 tbs champagne vinegar, or cider vinegar, or lemon juice (I prefer the champagne vinegar.)
4 tbs orange juice concentrate
2 tbs lime juice, about 1/2 lime
4 tbs olive oil
1/2 tsp cumin
2 tbs chopped cilantro
1 red chili, or hot pepper, or bell pepper  (I usually use a red bell pepper for color anyway.)
1/2 tsp chili flakes (optional if not using a hot pepper)
salt and pepper

                                                                           Instructions

   Combine all the vinaigrette salad dressing ingredients in a jar, close it tight, and shake until the ingredients are well mixed. In a frying pan, turn the heat to medium-low heat. Add 1 tablespoon of olive oil and the pumpkin seeds. Stir and lightly toast the seeds until they are slightly golden brown. Watch them carefully ! Soak the onion slices in warm water with a dash of salt and 1 tbs lime juice for about 10 minutes. Rinse and drain the onion slices. toss the arugula or other greens with half the vinaigrette. Add the avocado slices, mango slices, and onion slices to the arugula/greens mix. Drizzle the remaining vinaigrette on top. Sprinkle the toasted pumpkin seeds on top. Serve immediately ! This salad is good with rice on the side too.
   I am praying for you, your families, and the people of the world ; for your protection, strength, endurance, peace, and joy as we weather this trial together. Remember to eat as healthy as you can ! Much love from me !


Monday, February 25, 2019

California Fish Tacos !

In my younger years, I made a couple of treks to Ensenada, Mexico and the first time that I ever had a fish taco, I thought I had nearly died and gone to Heaven !!! My husband at the time and I were down by the ocean dock looking at the fish market. We were amazed by the huge halibut that we saw with their with their eyes on one side of their bodies ! In the same area was a man who was selling halibut fish tacos at his taco stand. Neither of us had ever had fish tacos before, so being hungry, we decided to go for it and try them ! Wow, we swooned and couldn't believe how fabulous they were ! The taco consisted of  hot and super fresh halibut, mayonnaise or a creamy sauce, salsa, cilantro, and green cabbage in corn tortillas (probably handmade).
   I like to make these tacos especially when fresh wild caught halibut and salmon are in season. I was pleasantly surprised recently when I hesitantly bought  previously frozen wild caught salmon and  previously frozen wild halibut at Whole Foods Market. The fish actually tasted really good and didn't have that older taste and rubbery texture ! Go figure ! I don't buy farmed fish, because I don't trust what may be in the water with the fish ! I also found some delicious Mission Organic Tortillas at Sprouts Farmer's  Market that are not completely cooked, so when I cooked them in a little olive oil, they were delicate and fresh tasting. I used diced heirloom tomatoes from our local farmers market, which I feel have more flavor than other tomatoes.
   In addition to adding salsa, I like to make a creamy sauce out of equal parts mayonnaise and plain yogurt, lime juice, and La Tapatia hot sauce. So here's this easy recipe......!

                                                                  Fish Tacos

Salmon, Halibut, or other fish (1/4 lb per person) wild caught if possible
Olive or avocado, or oil of your preference
Corn tortillas (I prefer Mission Organic Uncooked Corn Tortillas, found at Sprout's Market          
Cabbage, shredded, purple or green
Lettuce, I use Romaine or baby greens
Tomatoes, diced (I like heirloom varieties.)
Bell peppers, pan griled in a little oil (Optional)
Salsa, bought, your choice, or homemade, or taco sauce (I like Cholula Hot Sauce.)
Cilantro, chopped
Creamy fish taco sauce, recipe follows...
   In a small bowl mix  until creamy 1/2 cup mayonnaise, 1/2 cup plain yogurt, juice of 1/2- 1 whole lime, and 1- 2 teaspoons taco sauce. Taste and see if you think it needs more hot sauce or lime juice.

                                                                     Procedure

   Shred your cabbage with a grater, a mandoline, or slice it thinly with a knife. Slice or chop the lettuce thinly. Dice the tomatoes in 1/4-1/2 inch squares or slice in thin slices. Chop the cilantro. Make the creamy fish taco sauce, recipe above.

   To keep your cooked tortillas warm, turn your oven on low heat, about 200-225 degrees for 5-10 minutes, place your plate or plates inside, and then turn the oven off. (You can also put the tortillas in a tortilla warmer.) Pour 2-3 tablespoons of oil in a frying pan and heat on medium high heat. When the oil is hot, add a tortilla, fry for about a minute on one side and about a minute on the other side. Place the tortilla on a paper towel to soak up some of the oil if you want (I don't most of the time.)  Place your tortillas on the warm plates in the oven. Pour 2 tablespoons oil into the frying pan if needed, for frying the fish.
   Salt and pepper both sides of your fish, and place the filets in the frying pan. (The fish could be grilled on a cast-iron grill pan, or on your bar-b-que as well.) I cook salmon and halibut filets about 4 minutes on each side if the fish is about 1 inch thick. if your fish is thinner, you may want to cook it for less time. Cut the fish into 1/2 inch cubes or shred it with 2 forks into pieces.
   Lay some of the fish down the center of the tortillas, spread the salsa and the creamy sauce on top. Add the cabbage, lettuce, tomatoes, pan grilled bell peppers (optional), and cilantro. I like to serve these tacos with pineapple or other fruit slices on the side !
   Enjoy these tacos at home, in the back yard, on the beach, or camping like our family used to at Leo Carillo Beach Campground, in California !!
                                                   God bless you special people !


Wednesday, January 16, 2019

Grilled Cheese 'n Jam Tartine !

   What is better than a warm grilled cheese sandwich or scrumptious buttered toast and jam ? Well, one day I decided to combine two of my favorite foods together ! Here I have buttered toast with aged cheddar cheese broiled on top and a dollop of apricot jam...ooooweee ! You could also put pickles, roasted veggies, olives, arugula, spinach, assorted salad greens, fruit, or anything else that you like on top. Here's my easy-peasy recipe...

                                                           Ingredients

Bread, sour dough, whole wheat, or your choice
Cheese, cheddar, jack, swiss, or your choice cut in slices
Jam, any flavor you like
Additional optional toppings ie.-pickles, olives, arugula, spinach, tomatos, grilled veggies, etc.
Butter

                                                            Procedure

     Turn the broiler on in your oven. Toast 1-2 slices lightly in a toaster. Butter the slices of bread on one side.  Place the slices of cheese on the bread and place on a baking sheet under the broiler. Broil for a few minutes, making sure to watch the bread carefully so it doesn't burn. Add dollops of jam or any toppings that suit your fancy ! Put some fresh fruit or a salad on the side and dive into your ooey gooey grilled cheese tartine !  Hmmm...If it is a cold day, these tartines would be good with a cup of hot chocolate...or a bowl of creamy tomato soup.... sitting in front of a warm fire....oh yeah....
                                      "Give us this day our daily bread." Luke 11:3              

Wednesday, October 31, 2018

My Trip to Provence !

   Bon jour mes amies ! This summer, my daughter Ashley married my new son Terrence in Italy this past August ! Since Europe was my destination, I decided to spend two weeks before the wedding in Provence, one of my favorite places in the world !
   My trip started out with my first night in Nice, on the southeastern coast of France. As you may know, you can be pretty tired when you arrive, if you've had a long voyage to get to your destination ! I arrived at my cute boutique hotel called Villa Rivoli, and very quickly took a very welcome afternoon nap !! Afterwards I noticed a flyer on the wall that described restaurants that were recommended by the hotel. One of the restaurants was right on the beach, and an easy stroll from the hotel. Bingo, that sounded exactly what I needed to refresh my weary body and mind ! I walked down the Promenade des Anglais, arrived at Ruhl Plage Restaurant and a sweet, smiling young lady seated me at a table right on the edge of the beach with its aqua blue water! Wow, I couldn't have gotten any closer if I had tried ! I ordered lemony, buttery Sole Meuniere, wonderful garlic green beans, a fresh garden salad, and a glass of Provencal rose wine. Children were playing in the chalky blue waves, even at 9:00 ! What a Heavenly meal and view !

My next destination took me to a beautiful Bed and Breakfast in Laurent des Abres, and area outside of Avignon. It was called Domaine du Moulin. It looked like a small castle with a long body of water that went under the house and extended into the large back yard. There also was a lovely pool and a pool house that had drinks in a refrigerator guests could buy. I spent my first day laying on a chaise under a fig tree, looking out at the pool because I had a cold and still needed the rest. The weather was very warm and humid and the cicadas were chirping like they were playing maracas, the sound lasting until sundown ! 

   I stayed in the Juliette Room, which was upstairs, overlooking the long body of water. The room had belonged to the owners' daughter, with antique furniture and a beautiful 1920's double pink marble sink in the bathroom. Two terrycloth robes were provided. 

   Antoinette the proprietress, and her kind lady helpers prepared a lovely buffet of eggs, cheeses, cold-cuts, breads, pastries, fruit, yogurt, etc. in the morning in the beautiful, light filled, blue and white  breakfast room. It was wonderful to go outside, eating breakfast under a pergola with a beautiful view of lavender, butterflies flittering about, and the expanse of the yard.
   I peeked into Antoinette's kitchen and it was so lovely that I asked her if I could take some photos. There was a gorgeous      white and shiney brass La Cornue stove that I wish I could have taken home with me ! Hand-painted tiles that Antoinette purchased in Portugal were on two walls, and there was a long  15th century table that servants most likely ate and worked on.
   There was also a guest kitchen on the first level of the chateau next to some of the other guest rooms that were furnished for families. We could prepare meals there as long as we cleaned up afterwards ! I met a man from Germany as he was doing his dishes and I was heating up my chicken noodle soup. We had a very nice and friendly conversation. I spent 3 nights there and then I was off to the Luberon area to stay out in the countryside, outside the little town of Oppede.
   The Luberon area of Provence is one of my favorite places in the world, a land of sunflowers, lavender, cherries, Cavaillon melons, vineyards, red-tiled farm houses, and sunshine. I was looking through the web-site called Theluberon.com where they have so many beautiful places to rent. Alas, I found a beautiful country property called Le Moulin, that had a 400 year old former windmill on it ! The owners had  converted it into a darling two story abode, with calm, tasteful, understated  white and gray decor ! The first floor had a light-filled small living room and a petite kitchen. I was so surprised to see the biggest double-decker  wicker and metal Lazy Susan that I had ever seen in my life ! You could turn it and it held pots, pans, pretty blue and white dishes, and silverware.
   Climbing the winding staircase, holding the rope attached to the wall, led me to the bedroom and the bathroom. I really liked the white plaster walls, the white bedspread on the bed, and the two windows on either sides on the bedroom that could be opened for the breezes to pass through. As I looked out the windows to see the green grass, rocks, and Oak trees, I could see how very thick the walls were...maybe about 18 inches thick ! Even though the walls were thick, I used a fan for cooling because Provence is hot and humid in the summer !
   When I arrived on the property, after having driven through the beautiful countryside, Vita the proprietress came out to greet me. She said that since I had arrived early, my room wasn't ready, so she led me along a lavender lined path to the pool. It was so lovely, with a vine covered pergola, views of vineyards and the countryside, lots of plants, stone steps, and a stone clothing changing hut with a red tile roof. It felt soooo good to glide through that cool water on that hot day !
One of the most enjoyable things that I did in the area was to take a cooking class with a French chef named Jean-Marc Villard, in his home in the little town of Maubec, about 20-30 minutes from where I was staying. Jean-Marc did the teaching and his sweet wife Alice booked the classes and also ate lunch with us outside in their  lovely garden ! We first visited a local farmer's co-op first to buy food for our cooking. All of the products came from local farmers such as vegetables, fruit, honey, lavender products, soaps, cheeses, and assorted flowers.
   Their kitchen had a large prep table where I and a family of 4 from Brooklyn gathered around to work. Our first little aperitif was mild little green Padron  peppers that were roasted, and  yummy ! Each of the 4 courses were accompanied by delicious  French wines ! Our next course was a savory shortbread cracker with roasted bell peppers, cucumber slices, and zucchini ribbons on top. A baby greens salad tossed in olive oil surrounded the shortbread with a Johnny-jump-up flower on top.
   The third course was tornados of beef topped with a red wine reduction sauce, nestled over slowly cooked onion confit, with a potato nest on top, and some baby greens for color. The coup-de-gras for dessert was pistachio cakes with tiny fresh berries, raspberry sauce, and yogurt sorbet ! This class was one of the highlights of my trip... I was walking on clouds afterwards and I can't thank you Jean-Marc and Alice enough !!!
    Another thrill of my voyage was to go see the lavender field in front of Abbaye du Senanque, outside the village of Gordes ! Ever since I have seen photos of this beautiful setting, I have wanted to go there ! Alas, my dream came true and I drove there in the late afternoon when most of the tourists were gone. Another American family was there, I got to chat with the mother and she took my photo. Wow, it was stunning !!
    I absolutely love Provence and I thank God for creating such a gorgeous  countryside. I highly recommend that you visit if you haven't been there ! I would advise you to go in the spring or fall because it is hot and humid there in the summer...but you would  probably miss seeing the lavender in bloom.  (Hey, California has lavender farms !) But go, go, go !!!


Tuesday, September 11, 2018

Squash Blossom Frittata !


Hello again ! I have been away from writing this blog for a long time...one reason being that my daughter Ashley got married to her hubby Terrence in Italy ! It took me months to plan my three week trip to France and Switzerland, and then to find my mother-of-the-bride outfit. I had a very blessed trip and the wedding festivities were beautiful !
   I found an easy recipe called Squash Blossom Frittata, by Jack Bishop, in his cookbook called "A Year in a Vegetarian Kitchen". Here is Jack's recipe, with a few little additions of my own. We are now ending summer and will soon be buying fall vegetables and fruit in California. Zuchini squash are still being sold, but I'm not sure about zucchini flowers. If you can't find these flowers now, perhaps you could use another edible flower or some beautiful herbs. Use the squash blossoms the day you buy them, otherwise they get mushy ! Yuk !!


Squash Blossom Frittata

8 large eggs
1/2 cup freshly grated Parmesan cheese
1 teaspoon chopped fresh thyme leaves, plus several small clusters of  thyme flowers (or other edible flowers) (I doubled this amount.)
1/2 teaspoon salt (I doubled this amount.)
Freshly ground black pepper
8 large squash blossoms
1 teaspoon extra-virgin olive oil (or 2 teaspoons)
(I added goat cheese, about 1/2 cup)

1.With a fork,beat the eggs, cheese, thyme, salt, and several grindings of pepper together in a medium bowl until well combined.

2. Rince the squash blossoms and inspect them for insects, shaking the blossoms to remove the insects and excess water. Pat the blossoms dry on paper towels. Trim and discard the green stem and tough bottom portion from each blossom, including the pistil inside the blossom. Cut each blossom in half lengthwise.

3. Move an oven rack to the top position and heat the broiler. Heat the oil in a medium ovenproof nonstick skillet over medium heat. When the pan is hot, swirl the pan to coat the oil to coat the pan bottom evenly. add the egg mixture and reduce the heat to medium-low. Cook just until the bottom of the frittata starts to set, about 2 minutes. Arrange the squash blossoms in a starburst pattern on the eggs, with the frilly leaves pointing toward the edge of the pan. Overlap the blossoms to cover the entire top surface of the frittata. (I also dropped bits of goat cheese in the frittata and on top.)  Continue to cook the frittata, occasionally sliding a spatula around the edges of the pan to loosen the frittata, until the bottom of the frittata is golden brown and the eggs are runny just on top, about 8 minutes.

4. Place the pan directly under the broiler and broil until the top is golden brown and set, 1 to 2 minutes. Watch carefully to prevent the frittata from burning.

5. Remove the pan from the broiler. Cut the frittata into wedges and serve or slide it onto a large platter and take it to the table whole. The frittata can also be cooled in the pan and then served at room temperature. (I sprinkled the sage blossoms on top for beauty.)
   Enjoy this frittata alone, with your spouse, or your company. Some salsa might be good on the side too ! Bon appetite and God bless you my friends !


Wednesday, November 15, 2017

Honey Apricot Crepes !

   Summer is over with its over- abundance of scrumptious fruit that I love, but that doesn't stop me from thinking about apricot crepes, especially since my good friend Sharon just got back from France, where she enjoyed eating yummy crepes ! Sharon asked me for my crepe recipe, so that is motivating me to write about crepes today !
   Since apricots are out of season now, the filling could be made with apples, or fresh or frozen berries or other fruit.
   When my daughters were little, we lived in a house that had a swimming pool and a wonderful, large apricot tree that usually was filled with juicy fruit ! We would go swimming and then grab a few apricots to snack on, the sweet sticky juice running down our hands and faces.              

My three daughters would have friends sleep over now and then, and sometimes I would make apricot crepes for their breakfast.  My daughter Ashley's good friend Allison went home and told her parents that she had  had apricot crepes at our house. Her parents said,"We want some apricot crepes too !" Ha ha, so I made some for them
, which Allison carried over for them !
   In my cooking, I like to use honey or another healthier sweetener instead of refined sugar if possible, so the apricot filling is sweetened with raw honey. These crepes also have a little whole wheat flour in the batter, so hopefully they are a little healthier than having been made with only refined white flour. If desired, crepes can be made in advance and frozen.

                                                          Honey Apricot Crepes

3/4 cup (4 oz/125 g) all purpose (plain) flour
1/4 cup whole wheat flour
1 1/4 cups (12 fl oz/ 475 ml) whole milk
1/4 cup plain yogurt
1 egg
1 teaspoon Marc de Bourgogne or other brandy or vanilla
1 teaspoon olive oil, light or virgin
1/4 teaspoon salt
butter for frying
powdered (icing) sugar for dusting
1/2 stick butter
4 cups pitted apricots, whole or cut in halves
1/4 cup raw honey
1/2 teaspoon cinnamon
1/2 teaspoon nutmeg, preferably freshly grated
1/4 teaspoon salt

   Turn your oven to 200 degrees for 5 minutes and then turn it off, so the oven is warm. Place a plate inside to hold the finished crepes, and plates you'll use for your guests.
   Put the flour in a medium sized bowl. Break the egg in the center and add the 1/4 teaspoon of salt. With a wire whisk slowly mix in the milk, the brandy or vanilla, and lastly the olive oil. It is best to let the batter rest for a few hours, covered, in a cool place. I don't do this because I want to eat my crepes as soon as possible !
   Melt about 1- 2 teaspoons of butter in an 8-inch (20-cm) skillet, letting it spread evenly over the bottom. When the skillet is hot, pour in about half of a small ladle of the batter, tilting so the mixture spreads evenly to cover the bottom. (A hot skillet will make the crepes look lacey and give them crispy edges !) Let the crepe turn golden brown and in about 40 seconds, turn it over with a spatula and cook for about 30 seconds more. Turn the crepe out and place it on the warm plate in the oven.
   Crepes made in advance, can be placed on a plate and reheated over gently boiling water.

                                                     Filling

   Wash and take the pits out of the apricots. Cut them in half or leave them whole. In a medium saucepan, on medium-low heat, place the butter, honey, cinnamon, nutmeg, salt, and apricots. Cook the apricots for about 20 minutes until the apricots are soft but not mushy. Taste the filling to see if it needs more honey or spices.  Put 1-2 tablespoons of the filling inside a crepe and roll it up. Place the crepe on a warm plate seam side down, and put some of the filling on top and add some whipped cream if desired.

   Variations...In a small saucepan, dilute the jam of your choice, and add a spoonful of cold water. Bring it to a boil, then remove from the heat. Pour this sauce over the folded crepes and sprinkle with powdered sugar, if desired.
   Or...Roll the crepes up and put a tablespoon of fromage blanc, cream cheese, or creme fraiche in the middle. Place the crepes on a serving platter and pour a thick, smooth puree of blackcurrents or other fruit on top.
   Crepes are also good with chocolate syrup, bananas, and strawberries !
   You also could try making the crepes using half white flour and half whole wheat flour.
   So treat yourself once in awhile to these yummy crepes ! Awwww...Thank you dear Lord for apricots and all the beautiful fruit you give us !!
   This recipe was adapted from "France A Culinary Journey" produced by Weldon Owen Pty Limited.